A Step-By-Step Guide To Building & Accessorizing Your DIY Outdoor Fire Pit

Outdoor fire pit products can get pretty costly. If you are thinking of redesigning your patio space in a unique and affordable way, consider taking on a DIY fire pit project! Building your own fire pit is a fun way to re-vamp your backyard while spending time with the family. You can build a fire pit and gravel area, or build one right on your patio space. Take these quick and easy-to-follow steps to create your own, personalized DIY fire pit, and learn the best ways to accessorize your fire pit area!
Step 1: Fire Pit Materials
If you are building your own fire pit, you will most likely be making one from stone, cinder block, or cement. This guide will outline the specific steps when building with landscaping pavers, but these instructions will be very similar for other materials. It is very important that your stones have not been soaked in water, because the heat from your finished fire pit can make these stones explode.
Another tip to keep in mind is the longevity of your chosen material. Concrete blocks are more likely to diminish faster from the heat, but replacement is inexpensive. When choosing materials, you can also decide whether or not you want to use an adhesive to stack your stones. Some pavers are heavy enough to build up without adhesives, but you can use cement or other non-combustible materials to make your fire pit extra secure.
For this guide, we will outline how to build a fire pit made of landscaping pavers, without using an adhesive, on a gravel platform. You will need approximately thirteen pavers for each level. This DIY fire pit has four levels, so that brings us to fifty-two pavers total.

Step 2: Preparing Your Yard
Know exactly where you want to place your fire pit! After hard work and dedication, you wouldn’t want to be disappointed with the location of your pit. Especially with a gravel platform, you want to mark off a sufficient amount of space. You can use a rope or garden hose to temporarily create a border for your fire pit area.
A few things to keep in mind…leave enough space in your yard for other patio furniture and accessories. Fire pits create a great ambiance, but you will want to have room for potential seating and dining options. Fire pits with tables are perfect for entertaining guests, but they may take up some additional space in the yard.
Step 3: Building Your Fire Pit!
To make your fire pit base secure, you will want to dig a hole that is about three inches deep. This will eliminate any grass and loose dirt that may be in the area, while ensuring that your first stack of paver stones is sturdy in the ground. Make this circular hole about five feet wide, (or wider, if you plan on using more stones for a larger pit). Remember, your pavers will take up quite a bit of room in this circle, so make sure you are happy with the width of your fire pit space.
Once you have dug your hole as evenly as possible, you can begin to lay your first level of paver stones. During this step, you will want to ensure your stones are as even as possible. By making your base evenly leveled, you are more likely to have a secure fire pit. To help guide yourself while laying the pavers, you can use a steel ring to place inside of your dugout area. Then, place your first level of pavers around the ring. When you are done, remove the ring, and adjust the pavers so that the corners meet. Again, an even base level will make for a more symmetrical fire pit!

After building a solid base, you can then move on to the next levels of your fire pit. Begin stacking your pavers so that the center lies right on the line where two stones from the first level meet. This will give you the brick wall look. You can use a level to make sure that you are keeping everything even as you go.
By choosing not to use an adhesive, your fire pit will have natural airways which is important for releasing smoke from burning wood and roaring fires. This also gives your fire pit a more natural look, with stylish imperfections.
If you opt for a cooking grate, you can leave the steel ring in the middle of your fire pit. Before stacking the last level of pavers, slide your grate into the steel ring. This will make it secure and allow for the perfect cooking height.
Step 4: Laying Your Gravel
Using the border you made from Step Two as a guide, spray the entire space with weed killer. Use a weed barrier to cover this area, to prepare for laying out the gravel. You can choose from many types of gravel, but pea gravel, ‘Jersey Shore’ gravel, and white marble chips seem to be the most desirable media for outdoor fire pit product lay outs.
Pea gravel is known for its smooth textured look. These are small, round stones, that vary in color. When you take a closer look, pea gravel has tan, black, red, brown, green, white, and blue colors. These subtle colors can make all the difference in your fire pit area. This type of gravel is known to be more aesthetically pleasing, and gives a softer look than other types of grey, jagged gravel.

‘Jersey Shore’ gravel is pretty much exactly the way it sounds—beachy! This type of gravel generally has a yellow color scheme. You will find flecks of tans, whites, and golds in this gravel. This is a unique way to add color to your backyard space. Jersey Shore gravel also creates a smooth look when laid out. Yellow is associated with happiness and positivity, perfect for experiencing an intimate fire pit night out in the yard!
Another top choice for DIY fire pit gravel is white marble chips. This bright, white gravel is a great way to brighten up your yard. With neutral white and light grey colors, white marble chips will compliment any of your backyard accessories or patio furniture. White can also give the illusion of a larger yard, and open up your patio space. These stones shimmer in the sunlight which is a great attention grabber, and creates an elegant look. White marble chips are generally used for walkways around the house, but it makes for a unique fire pit platform.
You can use a wheelbarrow to easily lay out your gravel. You will want to spread enough gravel so that you can’t see the black weed barrier underneath. In this case, a little extra is always better. Especially when the weather gets bad, additional gravel will be better weighed.
An Alternative to a Gravel Lay Out
DIY fire pits can be easily built on patio surfaces as opposed to building in your yard area. This requires less work than building a gravel fire pit area. Simply follow the same fire pit building steps, making sure to use a level after each layer of stone to ensure an even build. You can place a variety of materials inside the fire pit area so that your patio pavement stays fresh and new. Additional stones, bricks, or even sand is perfect for protecting your patio during fire pit use.
Step 5: Adding Some Table Space! (Optional)
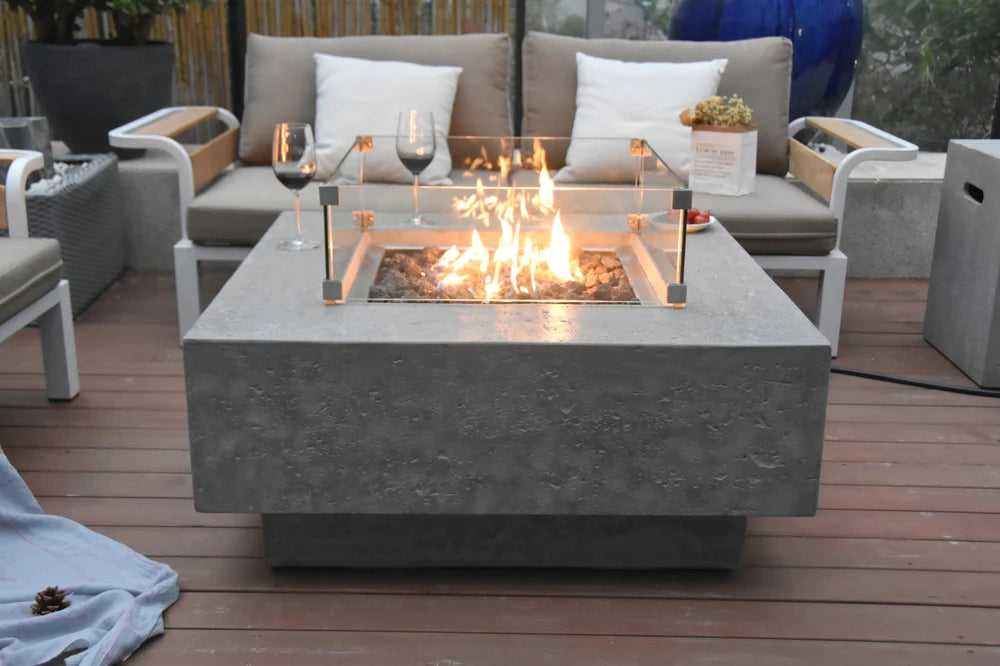
A unique way to change-up your DIY fire pit is to make it into a table! This is great for hosting guests and adding food to your fire pit experience. Fire pits with tables are a recent trend in outdoor dining. The benefits of doing a DIY pit with table space include cost-efficiency, room to personalize, and the option to remove the table top for different fire pit needs!

For this DIY fire pit, we chose to focus on a marble table top that will be placed over the stone fire pit. This would be the very last step in building your pit. After you have properly stacked your pavers and your fire pit looks complete, take careful measurements. You will want the diameter of the open space of the pit, as well as the diameter from the outer edges of the pavers. You may want to get a table top that exceeds these outermost measurements, to ensure plenty of table space for you and your guests.
Since your table top will have to have a perfect circle cut out in the middle, we suggest going to a hardware or home store to have this custom made. Once you have done this, you can place your marble table top over the perimeter of your fire pit. These are great materials to use for a DIY project since they have much weight to them, and will withstand harsh weather. Sit back and enjoy a cozy meal at your very own fire pit with table space!
Accessorizing Your DIY Fire Pit and Gravel Area
One recent trend in backyard decorating is the incorporation of green plants. You can find stylish planters in all different sizes to place around your fire pit for a warm and natural look. Another decorative favorite—sunflowers! Especially during the summer, (and if you chose to use Jersey Shore gravel), sunflowers are a bright and energetic way of accessorizing your fire pit area.
Don’t forget an important accessory…seating! Fire pit seating should generally be comfortable and lightweight. In terms of design, different styles and types of seating add to your backyard aesthetic. You can use a combination of cushioned chairs, rustic benches, and foldable canvas chairs to place around your fire pit. This is inviting for guests and gives everyone a great choice of seating for the night!
Even though fire pits are an efficient source of outdoor heating, some nights in the fall or winter may be extra cold! Keeping throw blankets with funky patterns on your fire pit chairs will make your fire pit area cozy and stylish.

Accessorizing Your DIY Patio Fire Pit
One fun way to add seating to your patio fire pit is to make DIY seating. If you have any extra pavers, don’t let them go to waste! You can stack these in half circles to make low-to-the-ground fire pit seating. To add some comfort, you can place colorful cushions or outdoor pillows on your DIY paver seats.
Make your own fire pit conversation set! Placing side tables around the pit creates a great spot for coffee cups and small snacks, allowing you to socialize for hours! If you choose to purchase outdoor seating to place around your fire pit, keep those trendy patio chair varieties in mind. Using a combination of folding chairs, outdoor couches, and benches will give your patio fire pit some personality and style!
Safety Tips
Be sure that any outdoor accessories you use to decorate your fire pit area are kept a good distance away from the pit itself. Especially if you made a gravel fire pit, you will want to be sure the fire is far enough from any of your grass area so that any stray embers end up in the stones as opposed to your yard.
Mastering DIY Fire Pit Projects
Using landscape pavers is a cost-efficient and easy option for a first-timer. Though this is a simpler model, it is still a trendy way to incorporate a self-built fire pit in your yard! Not only is this the less costly option, it is also sturdy and makes for a long-lasting backyard fire pit.
There are a ton of ways to personalize your DIY fire pits by changing up the materials, style, and type of fuels. This guide focused on stone fire pits on a patio space or gravel area in the backyard. However, once you have mastered DIY projects, you can move on to more complicated outdoor fire pit products.


